Ok, VMware isn’t really dead, but it is if like me, you are a user of free ESXi and VMware Workstation or VMware Fusion. I had my home lab built on it and now it’s almost impossible to get ESXi to run on consumer, hardware. So what to do.
It’s Christmas and what better way to spend it than undoing everything VMware and building and learning anew on another Hypervisor. I could use Hyper-V, but I am removing everything Windows based from my house and life wherever possible, Microsoft have lost their way IMO especially with the injection of co-pilot into everything, so I’ve decided that I am not supporting them anymore unless I absolutely have to.
ESXi 8.0 refused to install on my new lab PC because it has a RealTek NIC. There are now community drivers for RealTek 8111/8125/8126/8127 available in a community fling, courtesy of the people at William Lam https://williamlam.com/2025/11/realtek-network-driver-for-esxi.html, however, Broadcom no longer make offline (depot) files available to download unless you have a licence, so making a custom ISO with the RealTek fling was out of the question … After much procrastination, reading, and discussion, I decided to give Promox a go.
The installation of Proxmox was super simple. Download the ISO, create a bootable USB, connect to the PC and boot, with all the usual caveats about making it a boot device etc. within an hour I had wiped the NVMe of all traces of any Microsoft operating system and changed the boot sequence so now Proxmox boots off the SSD and my VMs are on a lovely, quick, NVMe
That’s it. That’s the start of my journey to Proxmox, but how do I now move all my VMware VMs to this new shiny Hypervisor? I have a quite a few!
Well in Proxmox 9.1.4 (maybe earlier but this is the version I have running) there is a beautiful import option. Simply connect the Proxmox server to your ESXi Server and it will enumerate the datastores and give you the option of importing the VMs directly.
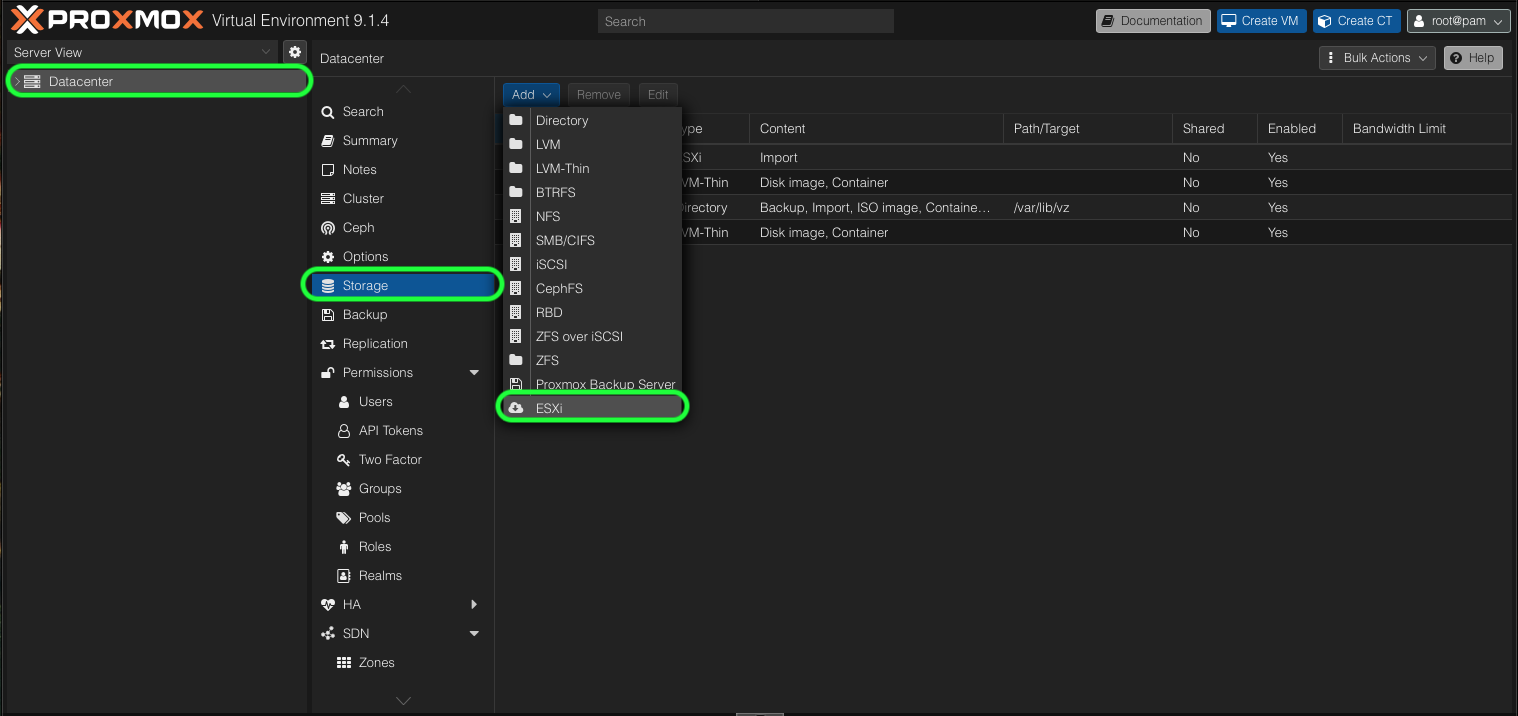
Step 1 – Create a new ESXi Store on Proxmox
Go To Datacentre > Storage > Choose Add > ESXi
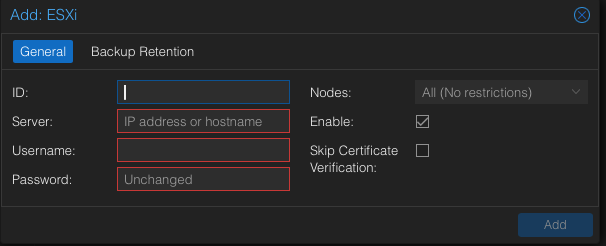
Complete each section with a ID(name), IP Address or Hostname, Username (for the ESXi host) and Password and click Add
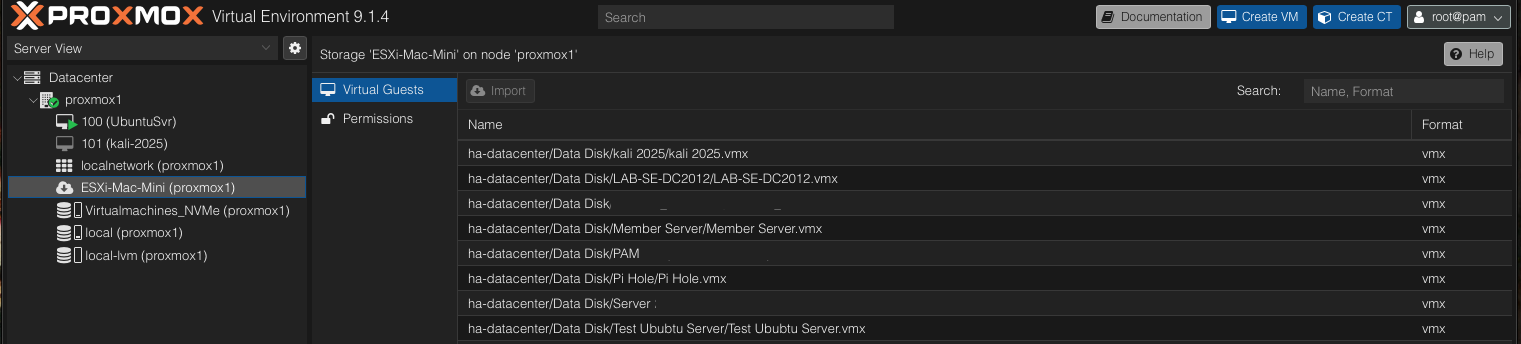
Step 2 – Import your VMs from the ESXi Datastore
Click on the newly Added Cloud Store Icon in the left menu that shows the ID you created and watch the right pane populate with all your VMs
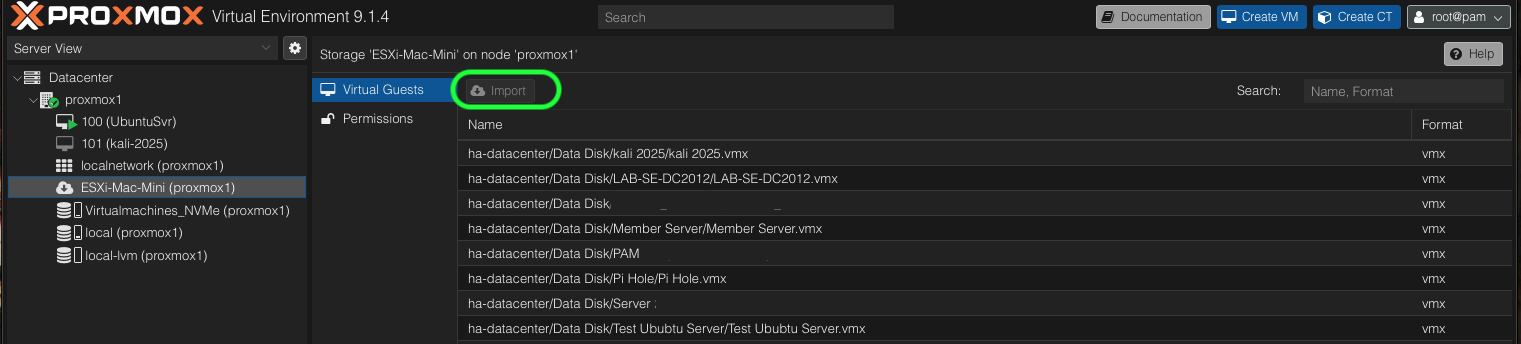
Select the VM you wish to Import and click Import
And now you have all your old VMware VMs in Proxmox. You may have to tweak some settings for Windows OS especially for UEFI and TPM things, but at least you have them moved over from one host to the other.
UPDATE 25/12/2025 18:32 GMT
It appears that there might be some issues if the VMs on ESXI use UEFI secure boot. I’ve only tried one Kali machine which appeared to transfer without a hitch but won’t reboot at all citing no boot disk. It appears to be linked with UEFI. I’ll update this post when (and if) I get to the bottom of it.
UPDATE 26/12/2025 08:20 GMT
A little bit of reading and even more “paying attention” and when you do the import it actually links to this article https://pve.proxmox.com/wiki/OVMF/UEFI_Boot_Entries that walks you through step by step adding the EFI boot entry. I followed this and my imported Kali machine came to life immediately. Problem solved for now.
Interestingly, I also imported a Server 2019 Core VM and that booted without intervention despite the same warning on the import screen.